

Playwright testing: how to write and run E2E tests properly

End-to-end tests are an essential part of any comprehensive testing strategy, but creating them can be a time-consuming and tedious process. What if we told you there’s a better way?
As a member of a web development team, you probably understand the importance of thoroughly testing your web applications before deploying them to production. End-to-end (E2E) tests are an essential part of any comprehensive testing strategy, ensuring that all the components of the web application work together as expected. However, creating E2E tests can be a time-consuming and tedious process. But it doesn’t have to be that way. We’re going to show you how to do it properly with Playwright.
Playwright vs. Selenium for E2E testing
For years, Selenium has been the go-to tool for E2E testing. However, it has its own issues that can make the testing process frustrating. Selenium can be slow, particularly when dealing with complex web applications, and its APIs can be confusing and difficult to work with. Playwright aims to address these issues, offering a modern and efficient approach to E2E testing.
What is Playwright?
Playwright is a popular testing and web automation library that was developed by Microsoft and released in 2020. It's a tool that's gaining popularity among web developers due to its many features that streamline the testing process and make it less of a headache.
Playwright started as a fork of Puppeteer, another popular web automation library. However, Playwright quickly evolved to become its own library, with additional features specifically tailored to testing. While Puppeteer provides web automation features such as scraping and crawling, Playwright takes things a step further with its powerful testing capabilities. In fact, Playwright now has its own feature-packed test runner, making it a one-stop shop for web automation and testing.
What are the features of Playwright?
Playwright comes packed with features that make it a must-have tool for web developers who want to streamline their testing process. Here are just a few of the features that make Playwright stand out:
1. Automatic waiting
Playwright has a unique automatic waiting feature that eliminates the need for developers to write custom waits or sleep statements in their test scripts. This means you can focus on writing high-quality tests instead of worrying about writing the perfect waiting logic.
2. Video recording of test runs
Playwright can record videos of your test runs, making it easier to identify bugs and collaborate with remote teams.
3. Multi-browser support
Playwright supports multiple browsers, including Firefox, Chromium, and WebKit. This means you can test your web applications in different environments without having to worry about browser-specific behaviors.
4. Headless and headful modes
Playwright allows you to choose between headless and headful modes. Headless mode means tests run without opening an actual browser window, making it ideal for running tests on servers or in CI/CD pipelines. But if you prefer to debug tests during development, you can use headful mode, which opens a browser window.
5. Native mobile emulation
Playwright supports native mobile emulation, which means you can test your web applications on mobile devices without having to set up an actual device. Playwright can emulate Safari on iOS, as well as Android devices.
Using Playwright in Jest tests
While Playwright can be used as a standalone test runner (we’ll get to that later), it can also be integrated with other testing frameworks. Jest, another popular testing framework, can be used with Playwright out of the box , as in the following example:
// plain_jest_playwright.test.js
import { chromium } from 'playwright';

describe('Playwright with Jest', () => {
  test('should launch a browser', async () => {
    const browser = await chromium.launch();
    const page = await browser.newPage();
    await page.goto('https://www.apify.com');
    const title = await page.title();
    expect(title).toContain('Apify');
    await browser.close();
  });
});
While Playwright provides many features that streamline the testing process, it's important to ensure that the tests remain maintainable and adhere to the DRY (Don't Repeat Yourself) principle. When using Playwright in Jest tests, for example, it's possible to simplify the code by sharing the browser object between different tests. However, this can lead to race conditions in some cases, which may make the code harder to maintain. It's important – and pretty hard – to find a balance between simplicity and maintainability when using Jest+Playwright in your testing process.
jest-playwright to the rescue?
You can make Jest+Playwright tests more readable by using the jest-playwright plugin. It takes care of spinning up and configuring the browsers, so you can simply use the page object in your test definitions.
// jest-playwright_example.test.ts
test('should display correct browser', async () => {
  await page.goto('https://apify.com');
    const title = await page.title();
  expect(title).toContain('Apify');
});
The configuration for the Playwright Browser instance, such as screen size, device type, the user-agent string, etc., is loaded from an external configuration file.
If you're already familiar with the syntax of Jest tests, using the jest-playwright plugin might seem like an attractive option. But there are several reasons why it might not be the best choice for large-scale projects. Firstly, it's not a native solution, meaning that it requires additional configuration and setup. Secondly, the plugin is no longer actively maintained, so it may not receive updates or bug fixes in the future. Finally, jest-playwright is not an industry-wide standard, which means that it may not be the best choice for projects that require compatibility with other testing frameworks.
Playwright's internal test runner
Playwright's internal test runner provides a better alternative. The syntax is very similar to Jest tests, and the library has TypeScript support out of the box. Additionally, config options for device types, screen sizes, and other parameters are embedded in the library itself. Unlike jest-playwright, Playwright's test runner is not an external plugin, so it's guaranteed to work seamlessly with the rest of the library.
Another advantage of using Playwright's test runner is that it's not limited to JavaScript. Playwright has multiple bindings for different languages, including .NET, Python, and Java. This means that you can write tests in your language of choice and still benefit from Playwright's powerful automation features.
Playwright as a test framework
The Playwright integrated test runner is the recommended way to run tests using the Playwright library. While the test runner has been in Playwright for a long time (GitHub says two years at least), it started gaining traction only recently – and it is now actually considered the proper way to run tests with Playwright.
It provides a more robust and flexible solution compared to using third-party plugins like jest-playwright. This test runner is designed to work with the Playwright library out of the box, with support for TypeScript, JavaScript, Python, .NET, and Java bindings. It provides a powerful and easy-to-use API for automating web and mobile applications, with features like multi-browser support, automatic waits, and video recording of test runs. Let's take a closer look at the Playwright test runner and explore its features in more detail.
Below is a code snippet that demonstrates how easy it is to write tests using the Playwright integrated test runner. In this example, we'll navigate to a web page, fill in a form, and click a button to submit the form:
// playwright-native.test.ts
import { test, expect } from '@playwright/test';

test('has title', async ({ page }) => {
  await page.goto('https://playwright.dev/');

  // Expect a title "to contain" a substring.
  await expect(page).toHaveTitle(/Playwright/);
});

test('get started link', async ({ page }) => {
  await page.goto('https://apify.com/');

  // Click the get started link.
  await page.getByRole('link', { name: 'Get started' }).click();

  // Expects the URL to contain intro.
  await expect(page).toHaveURL(/.*intro/);
});
You see that the syntax for writing tests in Jest and Playwright is quite similar, with some minor differences. Playwright's syntax is designed to be more concise and readable than Jest's, and it includes a number of built-in features like auto-waits for elements and videos of test runs.
Overall, Playwright's syntax is more streamlined and easier to use, especially if you’re already familiar with Puppeteer or Selenium.
Comprehensive reports
Playwright provides comprehensive reporting options for test results. One option is to export the results as a machine-readable JSON file. This is useful if you want to integrate Playwright tests into a larger test suite or if you want to programmatically analyze the results.
Another option is to export the results as a stylish HTML page. This is a great option if you want to share the test results with other members of your team or with stakeholders. The HTML report includes detailed information about the test runs, including the number of passed and failed tests, the duration of each test, and any errors that occurred during the test run.
It also allows you to customize and create your own reports, giving you more flexibility and control over the test result reports you receive.
Overall, Playwright's reporting capabilities make it easy to keep track of your test results and share them with others.
Playwright Test runner can format the test results as an HTML page.
Test web apps on multiple devices
One of the key features of Playwright is its ability to test web applications on a wide variety of devices. Playwright's test runner provides numerous predefined configurations for device types and screen sizes, making it easy to test your web application on different devices without having to manually set up each configuration. For example, you can test your web app on an iPhone 12, a Samsung Galaxy S20, or a Google Pixel 4 with just a few lines of code.
By using the predefined configurations in Playwright, you can also easily test your web application on a wide range of devices and screen sizes, ensuring that it works as expected for all users.
You can run the same set of tests with different device configurations.
Apify's Playwright Test Runner actor
Setting up Playwright for testing can be a bit complicated, especially if you're not familiar with it. Fortunately, there are several wrapper programs that can help simplify the setup process. One such program is Apify's Playwright Test Runner, which allows you to run Playwright tests as cloud apps on the Apify platform.
Playwright Test Runner provides a simple and intuitive API for running E2E tests in Playwright. All you need to provide is the test suite, and it handles all the output parsing and browser configuration for you.
Using Playwright Test Runner can help you save time and reduce the complexity of your testing setup. It's a great tool for developers who want to get started testing with Playwright quickly and easily.
How to run Playwright tests
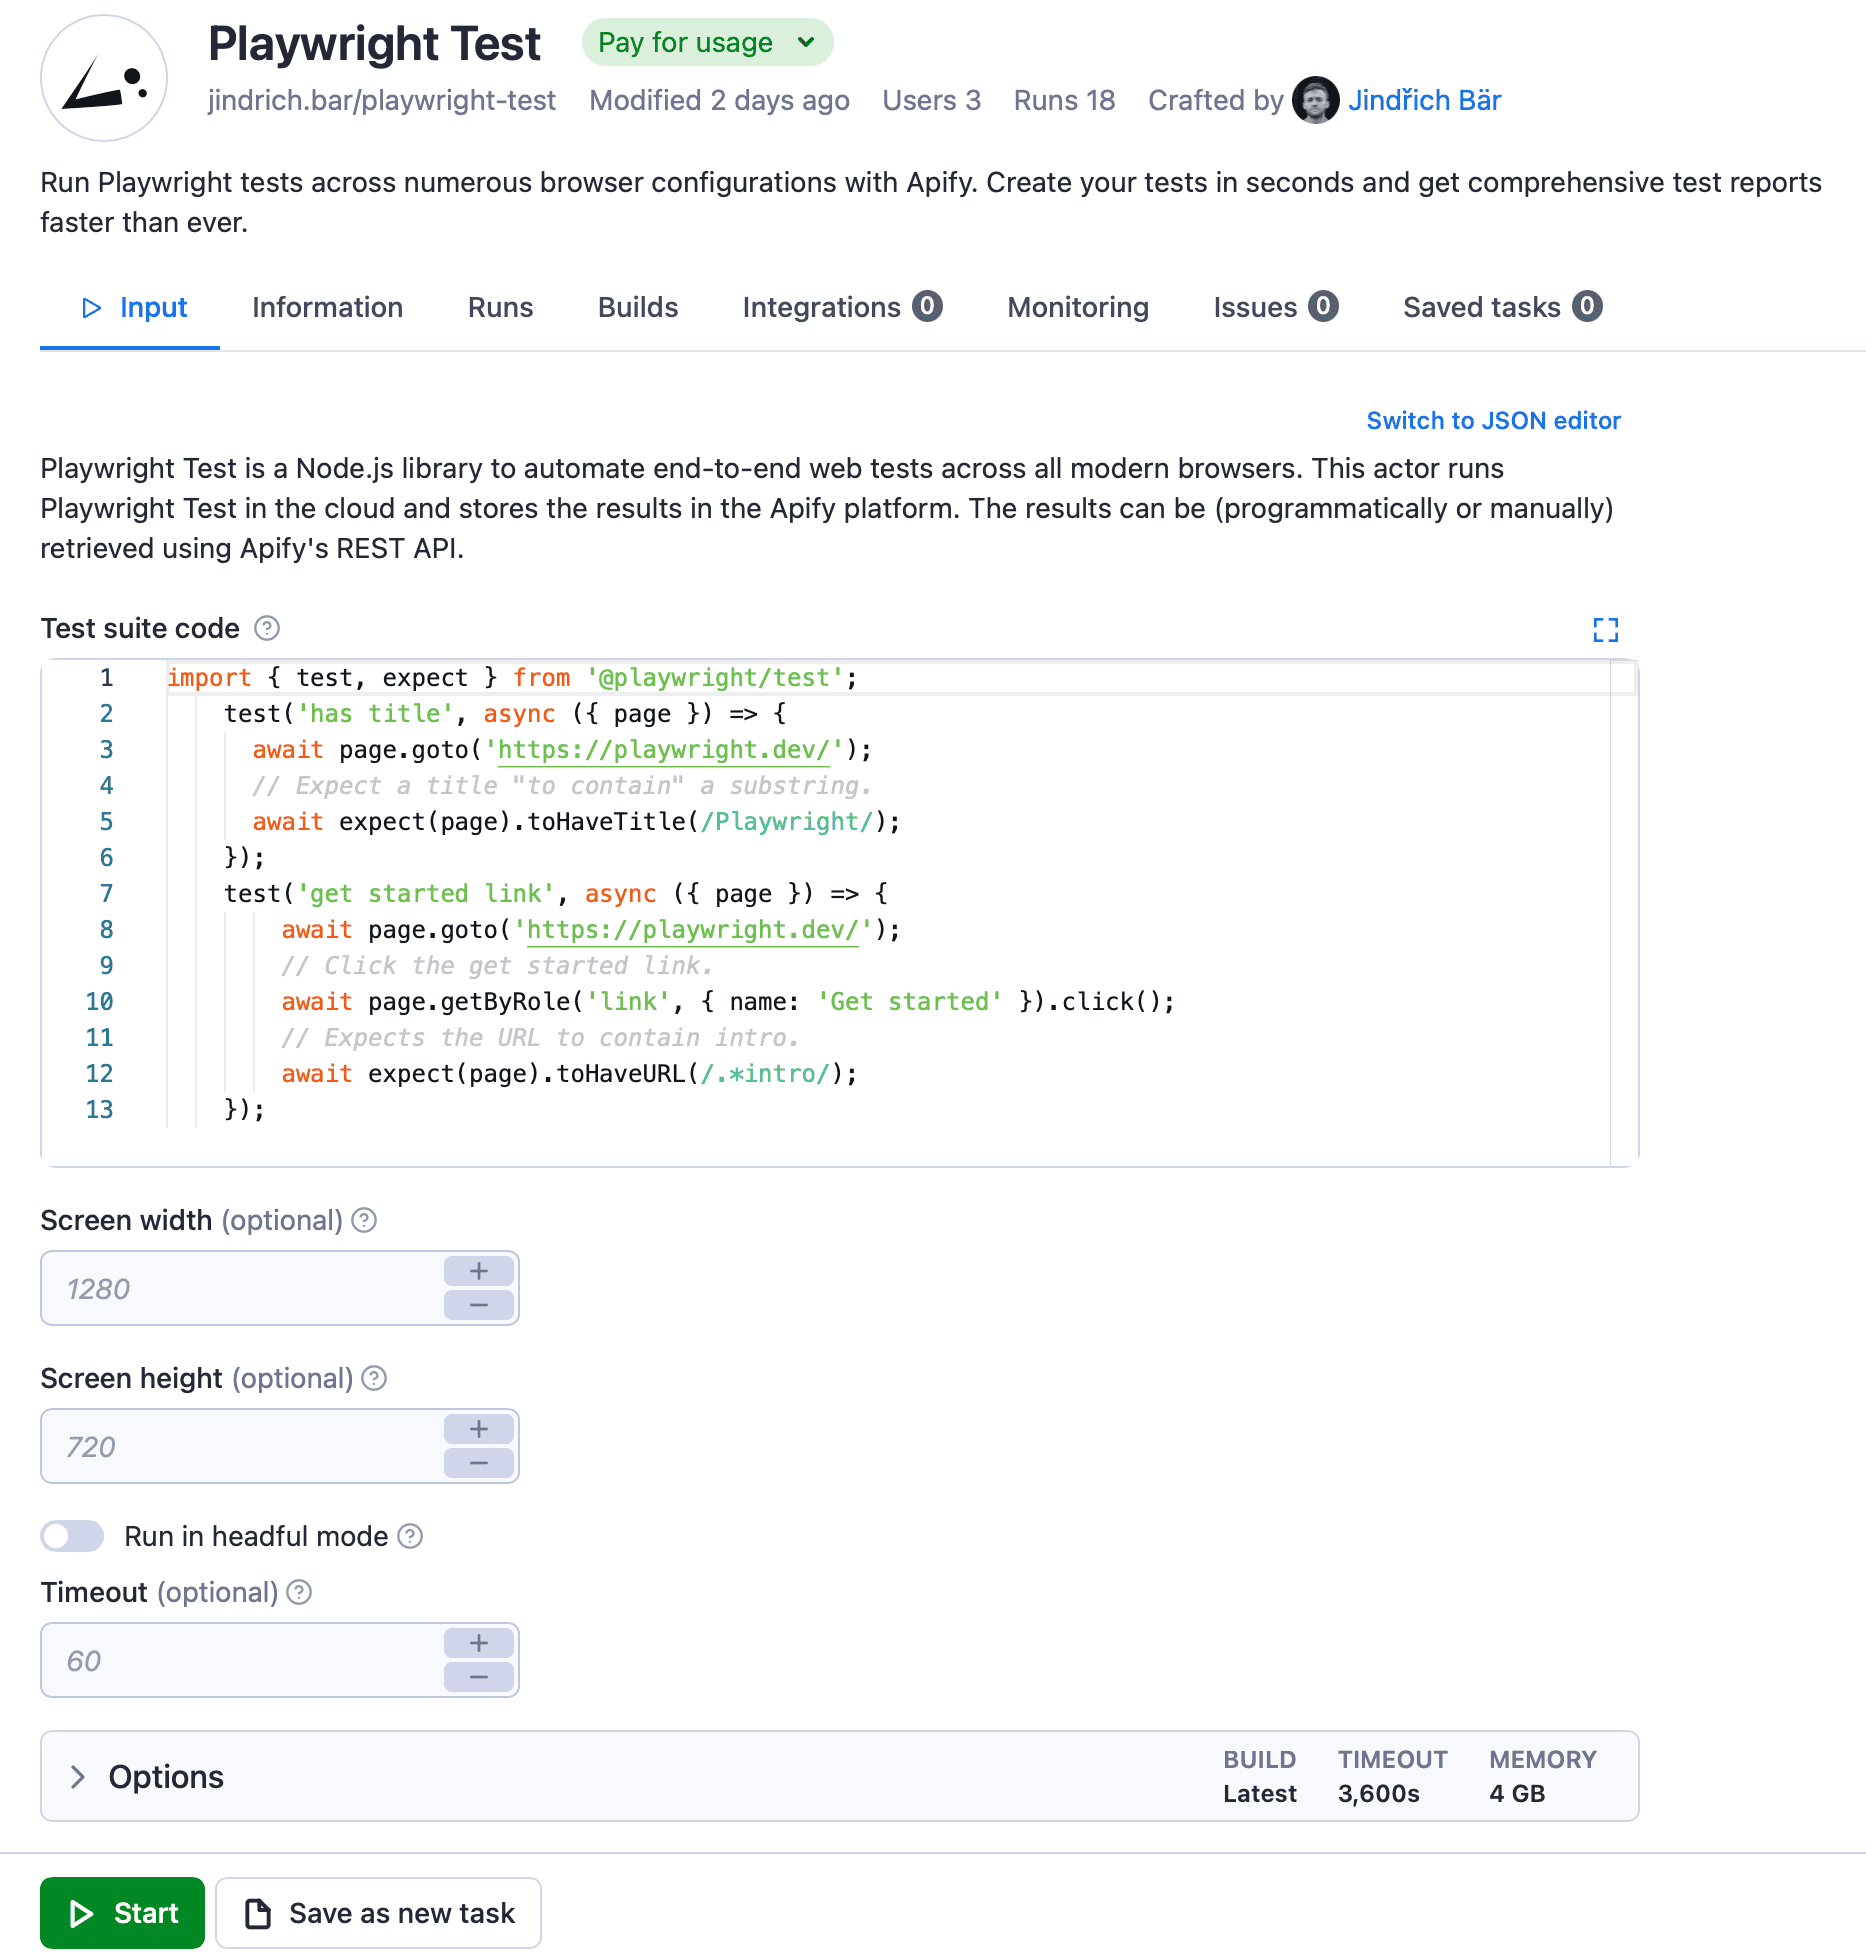
1. Insert your test code and customize your settings
To run tests with the Playwright Test Runner actor, just copy-paste your generated test code into the Test suite code field in the actor settings.
You can also customize the test run by specifying other options in the settings, e.g., the screen size, headful/headless execution, or the maximum run time.
2. Click Start to begin the run
We’ll keep it really simple for this example and use the default settings, which are there to demonstrate how the actor works. However you want to configure it, once you’re happy with your settings, click Start, and the actor will begin the run.
3. Export your results
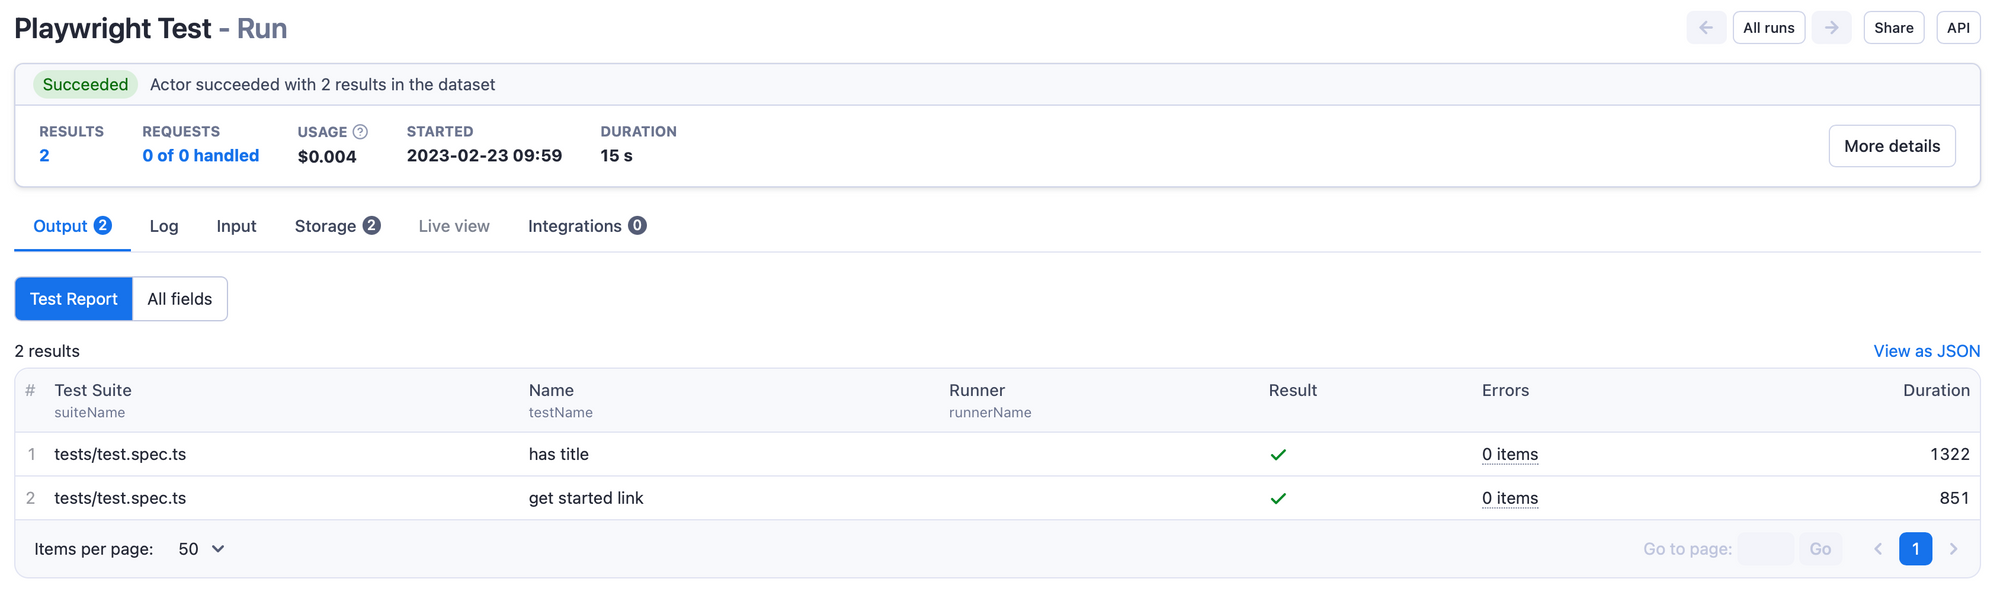
When the run has finished, the status will change from Running to Succeeded. Now you can click Export results at the bottom of the screen.

You can choose any of the available formats to preview or download your dataset.
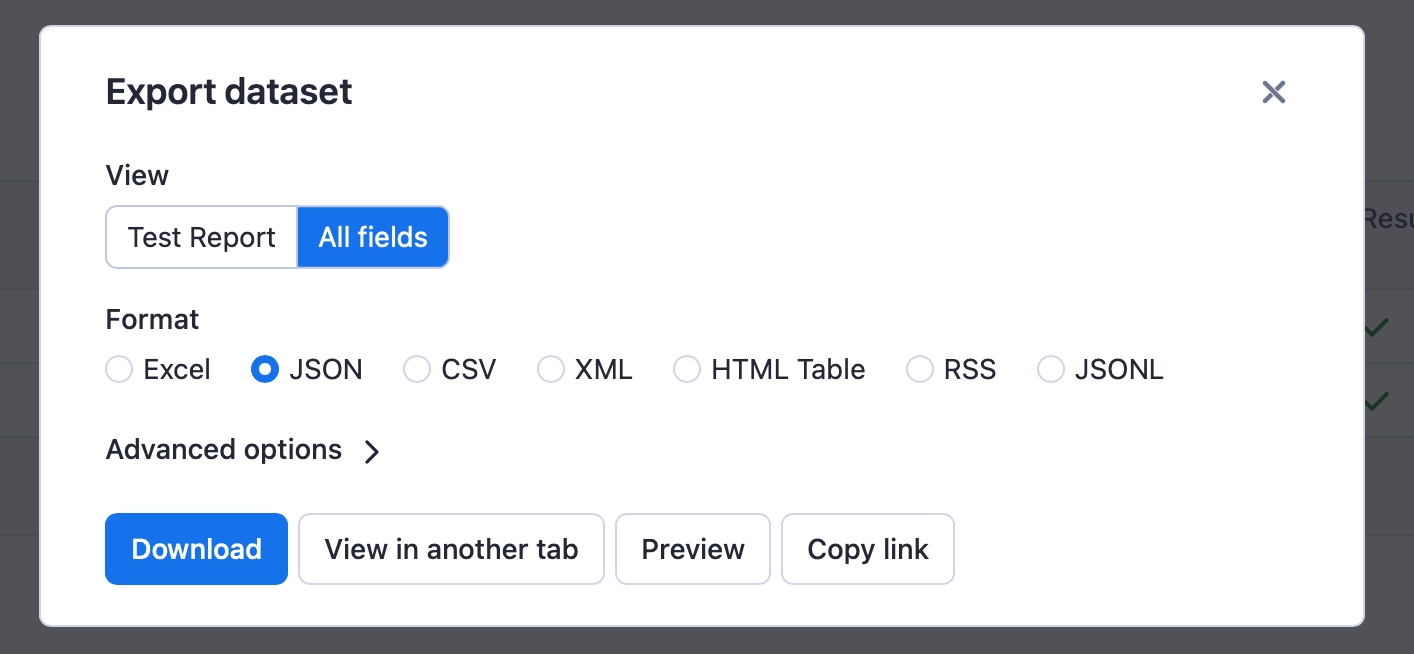
Here’s the exported dataset for this short and simple demo run in JSON:
[{
  "suiteName": "tests/test.spec.ts",
  "testName": "has title",
  "runnerName": "",
  "result": true,
  "errors": [],
  "duration": 1322
},
{
  "suiteName": "tests/test.spec.ts",
  "testName": "get started link",
  "runnerName": "",
  "result": true,
  "errors": [],
  "duration": 851
}]
The Apify platform stores the results in comprehensive datasets. You can view the results directly on the platform or download them to your local machine using a REST API.
So, why not give Playwright Test Runner a try for free and start running your Playwright tests on the Apify platform?


